此文章是翻译Implementation Notes这篇React(版本v16.2.0)官方文档。
Implementation Notes
这部分是stack reconciler 实现笔记集合。
这是非常技术性的,并且假设对React 公共API 有很强的理解,以及它如何划分为核心(core),渲染器(renderer)以及reconciler。如果你对React 代码库不是非常了解,首先阅读the codebase overview。
它还假设了解ReactDOM 组件、它们的实例和元素的之间的不同
stack reconciler 是在React 15 和之前版本使用。它位于src/renderers/shared/stack/reconciler。
Video: Buiding React from Scratch
Paul O'Shannessy 关于从头构建React 的演讲,大大的启发了这篇文档。
这篇文档和他的演讲是实际代码的简化,所以你可以更好的了解通过熟悉这两者。
Overview
reconciler 自身没有一个公共的API。Renderers 像React DOM 和React Native使用它根据用户写的React 组件去有效地更新用户界面(user interface)。
Mounting as a Recursive Process
让我们考虑首次加载一个组件:
ReactDOM.render(<App />, rootEl)
React DOM 将<App /> 传入reconciler。记住<App /> 是一个React 元素,也就是一个渲染成什么样的描述。你可以把它想象成一个普通的对象:
console.log(<App />)
// {type: App, props: {}}
reconciler 将检查App 是一个类还是一个函数。
如果App 是一个函数,reconciler 将调用App(props) 去得到这个已渲染的元素。
如果App 是一个类,reconciler 通过new App(props) 实例化一个App,调用componentWillMount 生命周期方法,然后调用render() 方法去获取这个已渲染的元素。
无论那种方式,reconciler 将会了解App 元素“被渲染成(rendered to)”。
这个过程是递归的(recursive),App 可能渲染成一个<Greeting />,Greeting 可能渲染成一个<Button />,等等。reconciler 将会递归地“向下获取数据(drill down)”通过用户定义的组件 ,当它了解每一个组件渲染成什么。
你可以将这一过程想象成一段伪代码。
function isClass(type) {
  // React.Component subclasses have this flag
  return (
    Boolean(type.prototype) &&
    Boolean(type.prototype.isReactComponent)
  );
}

// This function takes a React element (e.g. <App />)
// and returns a DOM or Native node representing the mounted tree.
function mount(element){
  var type = element.type
  var props = element.props

  // We will determine the rendered element
  // by either running the type as function
  // or creating an instance and calling render()
  var renderedElement
  if(isClass(type)){
    // Common class
    var publicInstance = new type(props)
    // Set the props
    publicInstance.props = props
    // Call the lifecycle if necessary
    if(publicInstance.componentWillMount){
      publicInstance.componentWillMount()
    }
    // Get the rendered element by calling render()
    renderedElement = publicInstance.render()
  }else{
    // Component function
    renderedElement = type(props)
  }

  // This process is recursive because a component may
  // return an element with a type of another component
  return mount(renderedElement)

  // Note: this implementation is incomplete and recurses infinitely!
  // It only handles elements like <App /> or <Button />.
  // It doesn't handle elments like <div /> or <p /> yet.
}

var rootEl = document.getElementById('root')
var node = mount(<App />)
rootEl.appendChild(node)
注意:
这真的是伪代码。它不同于真正的是实现。它将会导致一个栈溢出(stack overflow)因为我们还没有讨论什么时候去停止这个递归(recursion)。
让我们概括上述例子中的几个关键思路:
- React 元素是普通对象表示组件类型(例如:
App)和props。 - 用户定义的组件(例如:
App)可以是类或函数,但是它们都“渲染成(render to)”elements。 - “加载”是一个递归进程,通过给定顶级React 元素(例如
<App />)创建DOM 或Native 树。
Mounting Host Elements
这个过程将会是无效的,如果我们不渲染一些东西到屏幕上作为结果。
除了用户定义的(“composite”)组件,React 元素也可以表示平台特定的(“host”)组件。例如,Button 可能返回一个<div /> 从它的渲染方法中。
如果元素的type 属性是一个字符串,我们处理成一个host 元素。
console.log(<div />)
//  {type: 'div', props: {}}
没有用户定义的代码同host 元素相关联。
当reconciler 遇到一个host 元素,它让渲染器去处理加载它。例如,React DOM 将会创建一个DOM 节点。
如果host 元素有子节点,reconciler 将会根据上述的相同的算法递归加载它们。它不关心孩子节点是host(像<div><hr /></div>),还是composite(像<div><Button /></div>),或者两者都是。
被孩子组件生成的DOM 节点,将会追加到父DOM 节点,并且递归地,完成的DOM 结构将会被组装。
注意:
reconciler 自身不会绑定到DOM。加载的(有时,在源代码中称为“mount image”)最准确结果依赖渲染器,并且它亦是一个DOM 节点(React DOM),字符串(React DOM Server),或者是一个数字代表本地视图(React Native)。
如果我们扩展代码去处理host 元素,它将看上去像这样:
function isClass(type) {
  // React.Component subclasses have this flag
  return (
    Boolean(type.prototype) &&
    Boolean(type.prototype.isReactComponent)
  )
}

// This function only handles elements with a composite type.
// For example, it handles <App /> and <Button />, but not a <div />.
function mountComposite(element) {
  var type = element.type;
  var props = element.props;

  var renderedElement;
  if (isClass(type)) {
    // Component class
    var publicInstance = new type(props);
    // Set the props
    publicInstance.props = props;
    // Call the lifecycle if necessay
    if (publicInstance.componentWillMount) {
      publicInstance.componentWillMount();
    }
    renderedElement = publicInstance.render();
  } else if (typeof type === 'function') {
    // Component function
    renderedElement = type(props);
  }

  // This is recursive but we'll eventually reach the bottom of recursion when
  // the element is host <e.g. <div />) rather than composite (e.g. <App />);
  return mount(renderedElement);
}

// This function only handles elements with a host type.
// For example, it handles <div /> and <p /> but not an <App />.
function mountHost(element) {
  var type = element.type;
  var props = element.props;
  var children = props.children || [];
  if (!Array.isArray(children)) {
    children = [children];
  }
  children = children.filter(Boolean);

  // This block of code shouldn't be in the reconciler.
  // Different renderers might initialize nodes differently.
  // For example, React Native would create iOS or Android views.
  var node = document.createElement(type);
  Object.keys(props).forEach(propName => {
    if (propName !== children) {
      node.setAttribute(propName, props[propName]);
    }
  });

  // Mount the children
  children.forEach(childElement => {
    // Children may be host (e.g. <div />) or composite (e.g. <Button />).
    // We will also mount them recursively:
    var childNode = mount(childElement)

    // This line of code is alse renderer-specific.
    // It would be different depending on the renderer:
    node.appendChild(childNode);
  });

  // Return the DOM node as mount result.
  // This is where the recursion ends.
  return node;
}

function mount(element) {
  var type = element.type;
  if (typeof type === 'function') {
    // User-defined components
    return mountComposite(element);
  } else if (typeof type === 'string') {
    // Platform-specific components
    return mountHost(element);
  }
}

var rootEl = document.getElementById('root');
var node = mount(<App />);
rootEl.appendChild(node);
这是工作的,但是它仍然同reconciler 真正实现有相当远的距离。缺少关键的成分去支持更新。
Introducing Internal Instances
React 关键的特性是你可以重新渲染任何事情,并且它不会重新创建DOM 或者是重置state:
ReactDOM.render(<App />, rootEl);
// Should reuse the existing DOM
ReactDOM.render(<App />, rootEl);
然而,我们上述的实现仅知道如何去加载初始化树。在它上面不能执行更新因为它不存储任何必须要的信息,像所有的pulicInstance,或哪一个DOM node 对于哪一个组件。
stack reconciler 代码库解决它,通过制作mount() 函数作为方法,并将其放到它的类上。这种方法有缺点,我们将在相反的方法继续重新reconciler(ongoing rewrite of the reconciler)。然而,现在它就是这样工作的。
而不是分离mountHost 和mountComposite 函数,我们将要创建两个类:DOMComponent 和CompositeComponent。
这两个类都有一个接受element 的构造函数,除了一个返回已加载节点的mount() 方法之外。我们将使用工厂实例化正确类来替代顶级mount 方法:
function instantiateComponent(element) {
  var type = element.type;
  if (typeof type === 'function') {
    // User-defined components
    return new CompositeComponent(element);
  } else if (typeof type === 'string') {
    // Platform-specific components
    return new DOMComponent(element);
  }
}
首先,让我们考虑CompositeComponent 的实现:
class CompositeComponent {
  constructor(element) {
    this.currentElement = element;
    this.renderedElement = null;
    this.publicInstance = null;
  }

  getPublicInstance() {
    // For composite components, expose the class instance
    return this.publicInstance;
  }

  mount() {
    var element = this.currentElement;
    var type = element.type;
    var props = element.props;

    var publicInstance;
    var renderedElement;
    if (isClass(type)) {
      // Component class
      publicInstance = new type(props);
      // Set the props
      publicInstance.props = props;
      // Call the lifecycle if necessary
      if (publicInstance.componentWillMount) {
        publicInstance.componentWillMount();
      }
      renderedElement = publicInstance.render();
    } else if(typeof type === 'function') {
      // Component function
      publicInstance = null;
      renderedElement = type(props);
    }

    // Save the public instance
    this.publicInstance = publicInstance;

    // Instantiate the child internal instance according to the element.
    // It would be a DOMComponent for <div /> or <p />
    // and a CompositeComponent for <App /> or <Button />:
    var renderedComponent = instantiateComponent(renderedElement);
    this.renderedComponent = renderedComponent;

    // Mount the rendered output
    return renderedComponent.mount();
  }
}
这和我们之前的mountComposite() 实现并没有什么大的不同,但是,现在我们可以保存一些信息,例如this.currentElement,this.renderedComponent 以及各this.publicInstance ,为了在更新时使用。
注意CompositeComponent 的实例同用户提供的element.type 不是同一样东西。CompositeComponent 是我们的reconciler 实现细节,并且绝不会暴露给用户。用户提供的类是我们从element.type 读取的,并且CompositeComponent 创建它的一个实例。
为了避免产生困惑,我们称CompositeComponent 和DOMComponent 的实例为“内部实例(internal instances )”。它们存在所有我们可以将一些长期存在的数据同它们联系。只有渲染器和reconciler 意识到它们的存在。
相反,我们称用户定义的类的实例为“公共实例(public instance)”。公共实例是你在render() 方法以及其它自定义组件方法中看到的this。
mountHost() 函数重构为DOMComponent 类上的mount() 方法,看上去像:
class DOMComponent {
  constructor(element) {
    this.currentElement = element;
    this.renderedChildren = [];
    this.node = null;
  }

  getPublicInstance() {
    // For DOM components, only expose the DOM node.
    return this.node;
  }

  mount() {
    var element = this.currentElement;
    var type = element.type;
    var props = element.props;
    var children = props.children || [];
    if (!Array.isArray(children)) {
      children = [children];
    }

    // Create and save the node
    var node = document.createElement(type);
    this.node = node;


    // Set the attributes
    Object.keys(props).forEach(propName => {
      if (propName !== 'children'){
        node.setAttribute(propName, props[propName]);
      }
    });

    // Create and save the contained children.
    // Each of them can be a DOMComponent or a CompositeComponent,
    // depending on whether the element type is a string or a function.
    var renderedChildren = children.map(instantiateComponent);
    this.renderedChildren = renderedChildren;

    // Collect DOM nodes they return on mount
    var childNodes = renderedChildren.map(child => childmount);
    childNodes.forEach(childNode => node.appendChild(childNode));

    // Return the DOM node as mount result
    return node;
  }
}
mountHost() 重构后最大的不同是,现在我们保存this.node 和this.renderedChildren 到内部DOM 组件实例上。未来我们将要将其应用到非破坏性(non-destructive)更新上。
因此,每个内部实例,composite 或者host ,现在都指向它们孩子的内部实例。为了更好的理解它,如果一个函数式 <App> 组件渲染一个<Button> 类组件,并且Button 类渲染一个<div>,这个内部实例树看上去像这样:
[object CompositeComponent] {
  currentElement: <App />,
  publicInstance: null,
  renderedComponent: [object CompositeComponent] {
    currentElement: <Button />,
    publicInstance: [object Button],
    renderedComponent: [object DOMComponent]{
      currentElement: <div />,
      node: [object HTMLDivElement],
      renderedChildren: []
     }
  }
}
在DOM中你将只能看到<div>。然而内部实例树包括composite 和host 内部实例。
composite 内部实例需要存储:
- 当前元素。
- 公共实例,如果元素类型是类。
- 单个已经渲染的内部实例。它可以是
DOMComponent或者CompositeComponent。
host 内部实例需要存储:
- 当前元素。
- DOM 节点。
- 所有的孩子内部实例。它们中的每一个可以是
DOMComponent或CompositeComponent。
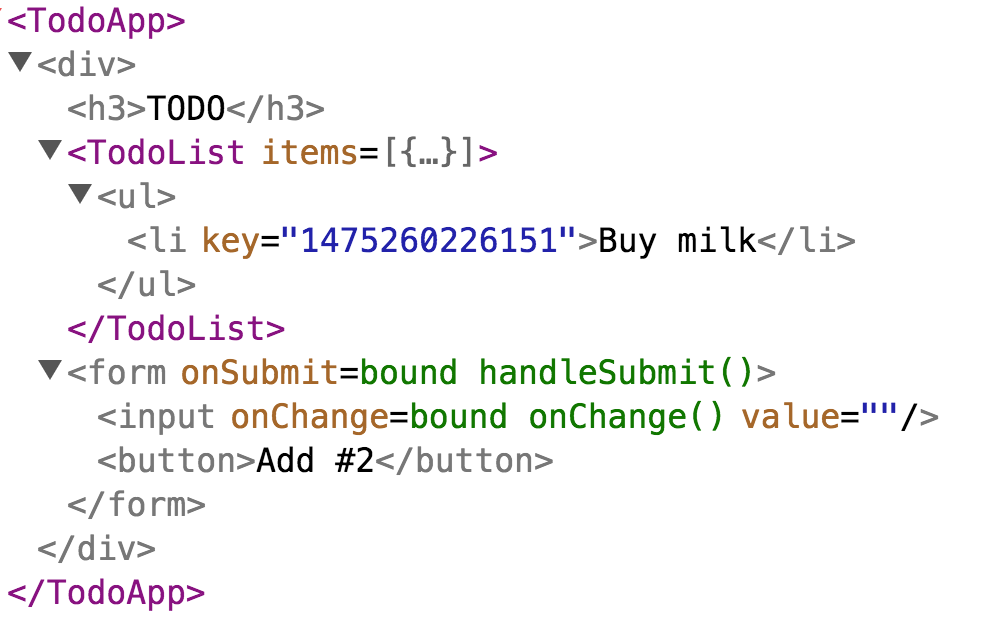
如果你很难想象在复杂应用中内部实例树的结构,React DevTools 可以给你一个非常近似的,因为它使用灰色高亮host 实例,使用紫色高亮composite 实例:
为了完成重构,我们将要引入一个函数来加载一个完整的树到容器节点中,就像ReactDOM.render() 。它返回一个公共实例,也像ReactDOM.render() :
function mountTree(element, containerNode) {
  // Create the top-level internal instance
  var rootComponent = instantiateComponent(element);

  // Mount the top-level component into the container
  var node = rootComponent.mount();
  containerNode.appendChild(node);

  // Return the public instance it provides
  var publicInstance = rootComponent.getPublicInstance();
  return publicInstance;
}

var rootEl = document.getElementById('root');
mountTree(<App />, rootEl);
Unmounting
现在我们有内部实例保存它们的孩子和DOM 节点,我们可以实现卸载。对于一个composite 组件,卸载递归地调用生命周期钩子。
class CompositeComponent {

  //...

  unmount() {
    // Call the lifecycle hook if necessary
    var publicInstance = this.publicInstance
    if (publicInstance) {
      if (publicInstance.componentWillUnmount) {
        publicInstance.componentWillUnmount();
      }
    }

    // Unmount the single rendered component
    var renderedComponent = this.renderedComponent;
    renderedComponent.unmount();
  }
}
对于DOMComponent,卸载告诉每一个孩子去卸载:
class DOMComponent {

  // ...

  unmount() {
    // Unmount all the children
    var renderedChildren = this.renderedChildren;
    renderedChildren.forEach(child => child.unmount());
  }
}
实际上,卸载DOM 组件也会移除事件侦听器以及清理一些缓存,但是我们将跳过这些细节。
我们现在可以添加一个unmountTree(containerNode) 的顶级函数,它同ReactDOM.unmountComponentAtNode() 非常相似:
function unmountTree(containerNode) {
  // Read the internal instance from a DOM node
  // (This doesn't work yet, we will need to change mountTree() to store it.)
  var node = containerNode.firstChild;
  var rootComponent = node._internalInstance;

  // Unmount the tree and clear the container
  rootComponent.unmount();
  containerNode.innerHTML = '';
}
为了让这能够工作,我们需要从DOM 节点中读取一个内部根实例。我们将修改mountTree() 方法,添加_internalInstance 属性到根DOM 节点。我们将教导mountTree() 去销毁任何已经存在的树,所以它可以被多次调用:
function mountTree(element, containerNode) {
  // Destroy any existing tree
  if (containerNode.firstChild) {
    unmountTree(containerNode);
  }

  // Create the top-level internal instance
  var rootComponent = instantiateComponent(element);

  // Mount the top-level component into the container
  var node = rootComponent.mount();
  containerNode.appendChild(node);

  // Save a reference to the internal instance
  node._internalInstance = rootComponent;

  // Return the public instance it provides
  var publicInstance = rootComponent.getPublicInstance();
  return publicInstance;
}
现在,运行unmountTree() ,或重复运行mountTree(),移除旧的树并且在组件上运行componentWillUnmount() 这个生命周期钩子。
Updating
在前面的章节,我们实现了卸载。然而React 将不会非常有用如果整个树中的每一个prop 都卸载然后加载。reconciler 的目标是复用已经存在实例,尽可能的保存DOM 和state。
var rootEl = document.getElementById('root');

mountTree(<App />, rootEl);
// Should reuse the existing DOM:
mountTree(<App />, rootEl);
我们将扩展我们的内部实例同一个或多个方法的联系。除了mount() 和unmount(),DOMComponent 和CompositeComponent 将会实现一个receive(nextElement) 新方法:
class CompositeComponent {
  // ...

  receive(nextElement) {
    // ...
  }
}

class DOMComponent {
  // ...

  receive(nextElement) {
    // ...
  }
}
它的任务是尽一切必要努力使组件(及其任意子即诶但)目前由nextelement 提供的描述更新。
这部分经常被描述为“虚拟DOM比较(virtual DOM diffing)”,虽然真正发生的是,我们递归内部树,并且让每一个内部实例收到更新。
Updating Composite Components
当composite 组件收到一个新的元素时,我们运行componentWillUpdate() 生命周期钩子。
然后我们重新渲染组件用新的props,并且得到下一个已经渲染的元素:
class CompositeComponent {

  // ...

  receive(nextElement) {
    var prevProps = this.currentElement.props;
    var publicInstance = this.publicInstance;
    var prevRenderedComponent = this.renderedComponent;
    var prevRenderedElement = prevRenderedComponent.currentElement;

    // Update *own* element
    this.currentElement = nextElement;
    var type = nextElement.type
    var nextProps = nextElement.props;

    // Figure out what the next render() output is
    var nextRenderedElement;
    if(isClass(type)) {
      // Component class
      // Call the lifecycle if necessary
      if(publicInstance.componentWillUpdate){
        publicInstance.componentWillUpdate(nextProps);
      }
      // Update the props
      publicInstance.props = nextProps;
      // Re-render
      nextRenderedElement = publicInstance.render();
    }else if(typeof type === 'function'){
      // Component function
      nextRenderedElement = type(nextProps);
    }

    // ...
接下来,我们可以查看已渲染元素的type。如果type 还没有改变自从上一次渲染,上面的组件可以在这个位置更新。
例如,如果首次它返回<Button color="red" />,第二次返回<Button color="blue" />,我们就可以告诉相应的内部实例去recevie() 下一个元素:
    // ...

    // If the rendered element type has not change,
    // reuse the existing component instance and exit.
    if (prevRenderedElement.type === nextRenderedElement.type) {
      prevRenderedComponent.receive(nextRenderedElement);
      return;
    }

    // ...
然而,如果接下来已渲染的元素同上一个已渲染的元素有不同的type,我们不能更新这个内部实例。例如,上一次渲染成<button /> 的组件渲染成<input /> 发生时:
相反,我们必须去卸载已经存在的内部实例,并加载对应已经渲染的元素类型。例如,这时会发生,当一个组件,之前渲染成<button />,而现在渲染成<input />
    // ...

    // If we reached this point, we need to unmount the previously
    // mounted component, mount the new one, and swap their nodes.

    // Find the old node because it will need to be replaced
    var prevNode = prevRenderedComponent.getHostNode()

    // Unmount the old child and mount a new child
    prevRenderedComponent.unmount()
    var nextRenderedComponent = instantiateComponent(nextRenderedElement)
    var nextNode = nextRenderedComponent.mount()

    // Replace the reference to the child
    this.renderedComponent = nextRenderedComponent

    // Replace the old node with the new one
    // Note: this is renderer-specific code and
    // ideally should live outside of CompositeComponent
    prevNode.parentNode.replaceChild(nextNode, prevNode)
  }
}
总结,当composite 组件收到一个新的元素,它可以要么代理这个更新到它自己已经渲染的内部实例上,要么卸载它并且在它的位置重新加载一个新的。
还有另外一种情况下,当组件将要重新加载而不是接受一个新的元素,那就是当元素的key 发生改变了。在文档中我们不讨论key 控制的情况,因为它对于一个已经复杂的说明书变得更加复杂。
注意我们需要添加一个名叫getHostNode() 的方法到内部实例上的契约,以至于可以定位平台特定的节点,在更新时用于替代它。它的实现对于两个类是直接的:
class CompositeComponent {
  // ...

  getHostNode() {
    // Ask the rendered component to provide it.
    // This will recursively drill down any any composites.
    return this.renderedComponent.getHostNode();
  }
}

class DOMComponent {
  // ...

  getHostNode() {
    return this.node;
  }
}
Updating Host Components
Host 组件实现,像DOMComponent,更新是不同的。当它们收到一个元素,它们需要更新底层平台特定的视图。如果React DOM ,这意味着需要更新DOM 特性:
class DOMComponent {
  // ...

  receive(nextElement) {
    var node = this.node;
    var prevElement = this.currentElement;
    var prevProps = prevElement.props;
    var nextProps = nextElement.props;
    this.currentElement = nextElement;

    // Remove old attribute
    Object.keys(prevProps).forEach(propName => {
      if(propName !== 'children' && !nextProps.hasOwnProperty(propName)){
        node.removeAttribute(propName);
      }
    });
    // Set next attribute
    Object.keys(nextProps).forEach(propName => {
      if(propName !== 'children'){
        node.setAttribute(propName, nextProps[propName]);
      }
    });

    // ...
然后,host 组件需要更新它们的孩子。不像composite 组件,它们可能包含多于一个子节点。
在这个简单例子中,我们使用内部实例数组并且遍历它,要么更新要么替换这个内部实例取决于收到的type 是否匹配它们之前的type。真正的reconciler 也需要元素的key 以及轨迹移动处理插入和删除,但是我们将忽略这个逻辑。
我们收集孩子节点上的DOM 操作到一个列表,所以我们可以一起执行它们:
  // ...

  // These are arrays of React elements:
  var prevChildren = prevProps.children || [];
  if (!Array.isArray(prevChildren)) {
    prevChildren = [prevChildren];
  }
  var nextChildren = nextProps.children || [];
  if (!Array.isArray(nextChildren)) {
    nextChildren = [nextChildren];
  }
  // These are arrays of internal instances:
  var prevRenderedChildren = this.renderedChildren;
  var nextRenderedChildren = [];

  // As we iterate over children, we will add operations to the array.
  var operationQueue = [];

  // Note: the section below is extremely simplified!
  // It doesn't handle reorders, children with holes, or keys.
  // It only exists illustrate the overall flow, not the specifices.

  for(var i = 0; i < nextChildren.length; i ++){
    // Try to get an existing internal instance for this child
    var prevChild = prevRenderedChildren[i];

    // If there is no internal instance under this index,
    // a child has been appended to the end. Create a new
    // internal instance, mount it, and use its node.
    if (!prevChild) {
      var nextChild = instantiateComponent(nextChildren[i]);
      var node = nextChild.mount();

      // Record that we need to append a node
      operationQueue.push({type: 'ADD', node});
      nextRenderedChildren.push(nextChild);
      continue;
    }

    // We can only update the instance if its element's type matches.
    // For example, <Button size="small" /> can be updated to
    // <Button size="large" /> but not to an <App />
    var canUpdate = prevChildren[i].type === nextChildren[i].type;

    // If we can't update an existing instance, we have to unmount it
    // and mount a new one instead of it.
    if (!canUpdate) {
      var prevNode = prevChild.node;
      prevNode.unmount();

      var nextChild = instantiateComponent(nextChildren[i]);
      var nextNode = nextChild.mount();

      // Record that we need to swap the nodes
      operationQueue.push({type: 'REPLACE', prevNode, nextNode});
      nextRenderedChildren.push(nextChild);
      continue;
    }

    // If we can update an existing internal instance
    // just let it receive the next element and handle its own update.
    prevChild.receive(nextChildren[i]);
    nextRenderedChildren.push(prevChild);
  }

  // Finally, unmount any children that don't exist:
  for(var j = nextChildren.length; j < prevChildren.length; j ++){
    var prevChild = prevRenderedChildren[j];
    var node = prevChild.node;
    prevChild.unmount();

    // Record that we need to remove the node
    operationQueue.push({type: 'REMOVE', type node});
  }

  // Point the list of rendered children to the updated version.
  this.renderedChildren = nextRenderedChildren;

  // ...
作为最后一步,我们执行DOM 操作。再一次,真正的reconciler 代码是更复杂的,因为它也处理移动:
    // ...

    // Process the operation queue.
    while (operationQueue.length > 0) {
      var operation = operationQueue.shift();
      switch (operation.type) {
        case 'ADD':
          this.node.appendChild(operation.node);
          break;
        case 'REPLACE':
          this.node.replaceChild(operation.nextNode, operation.prevNode);
          break;
        case 'REMOVE':
          this.node.removeChild(operation.node);
          break;
      }
    }
  }
}
然后这就是更新host 组件。
Top-Level Updates
现在CompositeComponent 和DOMComponent 实现了receive(nextElement) 方法,当元素的type 同上一次是一样,我们可以使用它改变顶级mountTree() 函数:
function mountTree(element, containerNode) {
  // Check for an exsiting tree
  if (containerNode.firstChild) {
    var prevNode = containerNode.firstChild;
    var preRootComponent = prevNode._internalInstance;
    var prevElement = prevRootComponent.currentElement;

    // If we can, reuse the existing root component
    if (prevElement.type === element.type) {
      prevRootComponent.receive(element);
      return;
    }

    // Otherwise, unmount the existing tree
    unmountTree(containerNode);
  }

  // ...

}
现在使用相同的类型调用mountTree() 两次,不会有破坏:
var rootEl = document.getElementById('root');

mountTree(<App />, rootEl);
// Reuse the existing DOM
mountTree(<App />, rootEl);
这就是React 内部怎样工作的基础。
What We Left Out
这篇文档同真实的代码库相比是简单的。这有几个重要的方面我们没有演讲:
- 组件可以渲染
null,并且reconciler 可以控制数组中的“空槽位(empty slots)”,并且渲染输出。 - reconciler 也可以从元素中读取
key,并且通过它确认哪一个内部实例对应数组中的哪一个元素。在实际React 实现中大量复杂都是和它相关。 - 除了composite 和host 内部实例类,还有“text” 和“empty”组件类。它们表示文档节点以及渲染为
null的“空槽位(empty slots)”。 - 渲染器使用injection 去传递host 内部实例类到reconciler。例如,React DOM 告诉reconciler 使用
ReactDOMComponent作为host 内部实例实现。 - 更新孩子列表的逻辑被提取成mixin 称为
ReactMultiChild,它在React DOM 和React Native 中的host 内部实例类实现。 - 在composite 组件中,reconciler 也实现支持
setState()。在事件句柄中的多个更新被绑定到一次更新中。 - reconciler 也会处理绑定和解绑定(attaching and detaching)refs 到composite 组件和host 节点上。
- 当DOM 准备好后生命周期钩子被调用,像
componentDidMount()和componentDidUpdate(),被收集到“回调队列(callback queues)”并且在一次性执行它们。 - React 将关于当前更新的信息放到一个内部对象上称为“(事务)tansaction”。事务对于在生命周期钩子期间,当前DOM 嵌套的警告,其它“全局(global)”配置更新队列上的轨迹是有用的。事务也确保更新之后,React“清理干净任何事情(clean everything up)”。例如,React DOM提供的事务类重新存储每次更新之后的输入选择。
Jumping into the Code
- ReactMount 就像这篇说明中
mountTree()和unmountTree()代码位于的地方。它处理顶级组件的加载和卸载。ReactNativeMount 是React Native 类似物。 - ReactDOMComponent 等同于这篇说明中的
DOMComponent。它实现了React DOM 渲染器的host 组件类。ReactNativeBaseComponent 是React Native 的类似物。 - ReactCompositeComponent 等同于这篇说明中的
CompositeComponent。它处理称为用户定义的组件和保存它们的state。 - instantiateReactComponent 包含选择正确的内部实例类去构造一个元素。它等同于这篇说明中的
instantiateComponent()。 - ReactReconciler 是
mountComponent(),receiveComponent()和unmountComponent()方法的包裹器。它称为在内部实例上的底层实现,但是也包裹被所有内部实例实现共享的代码。 - ReactChildReconciler 根据它们元素的
key实现加载、更新和卸载子节点的逻辑。 - ReactMutliChild 实现处理孩子节点的插入、删除以及渲染器独立的移动队列中的操作。
mount(),receive()和unmount()真正被称为mountComponent(),receiveComponent()和unmountComponent()在React 代码库中由于历史遗留原因,但是它们接受元素。- 内部实例上的属性以下划线(underscore)开始,例如,
_currentElement。它们被认为为只读的公共域贯穿更改代码库。
Future Directions
stack reconciler 有一些固有的限制性,例如同步和不能中断工作或分块。这有一个进行中的工作,使用完全不同的体系的new Fiber reconcier。未来,我们打算用它替换statck reconciler,但是目前它距离这个特性相等还很远。
Next Steps
阅读下一节 了解在React 开发中的使用指导规则。